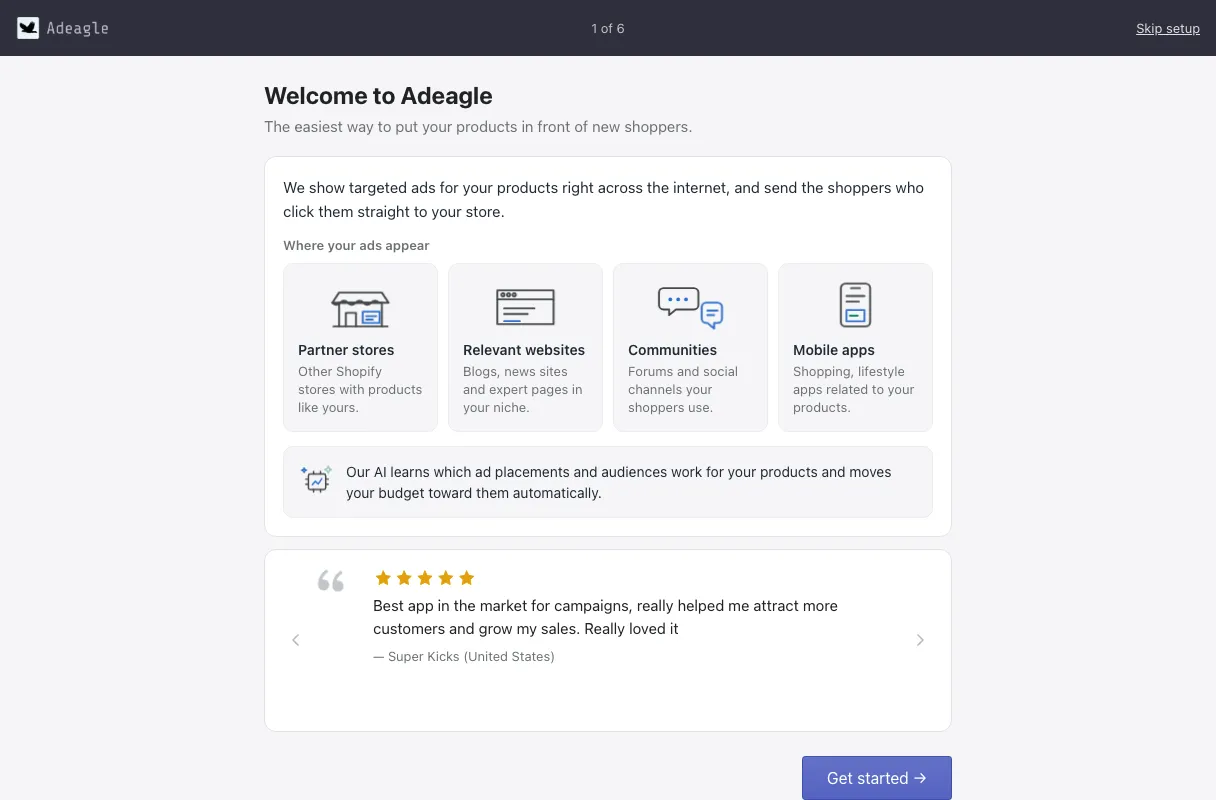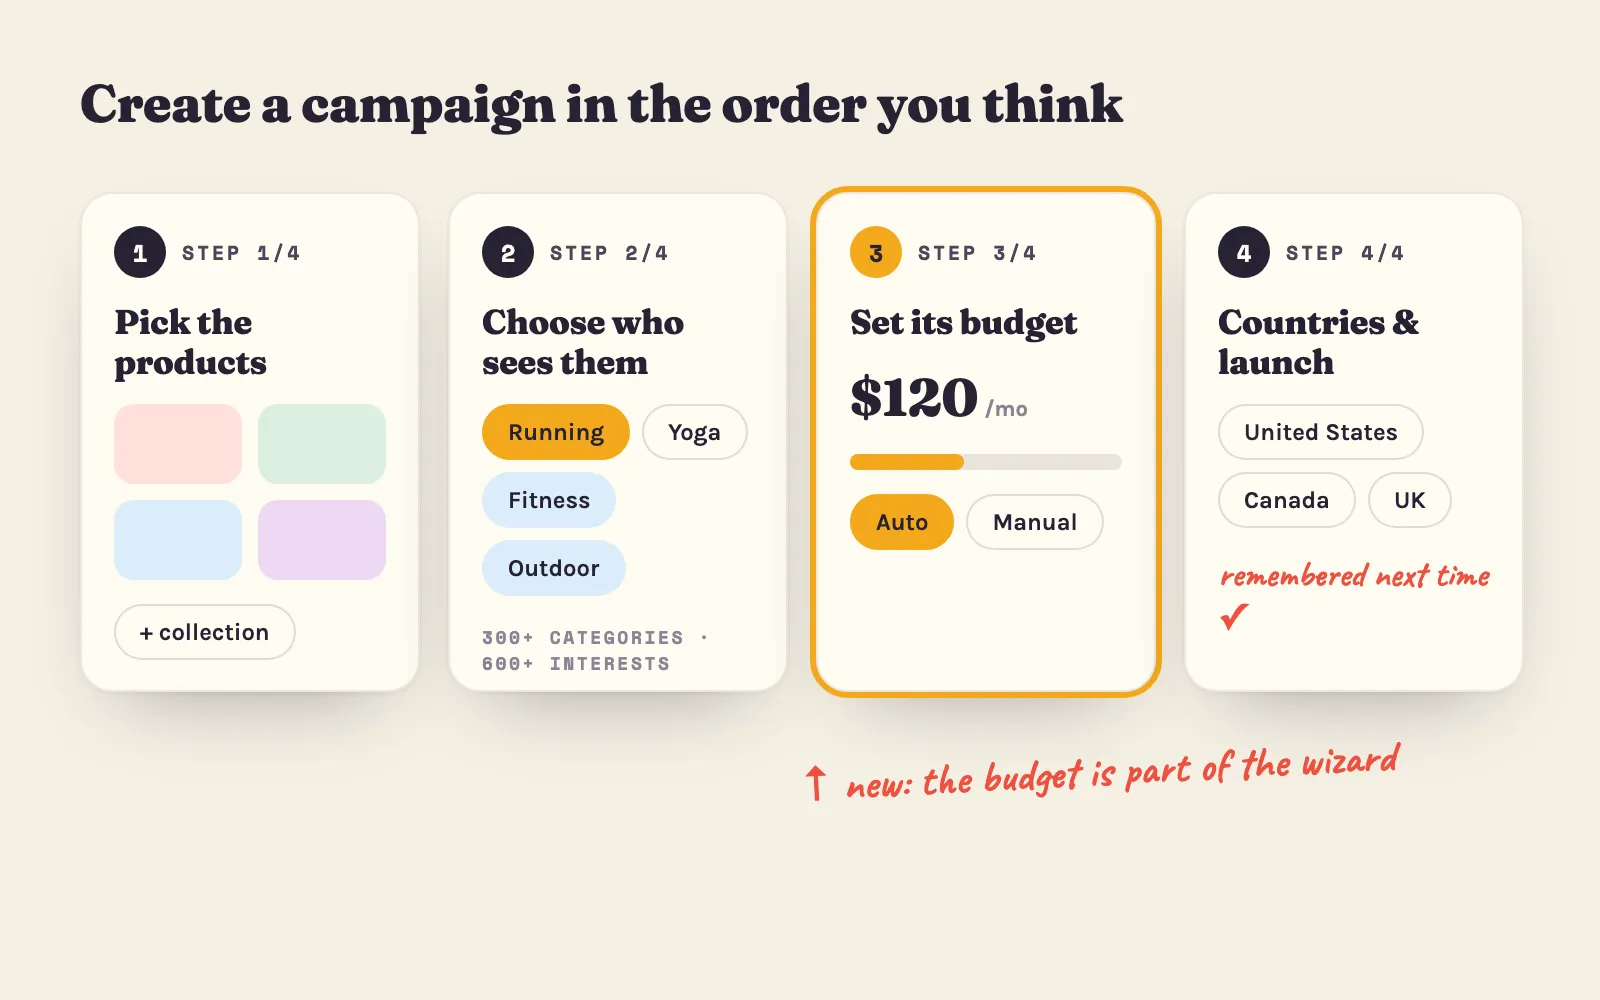

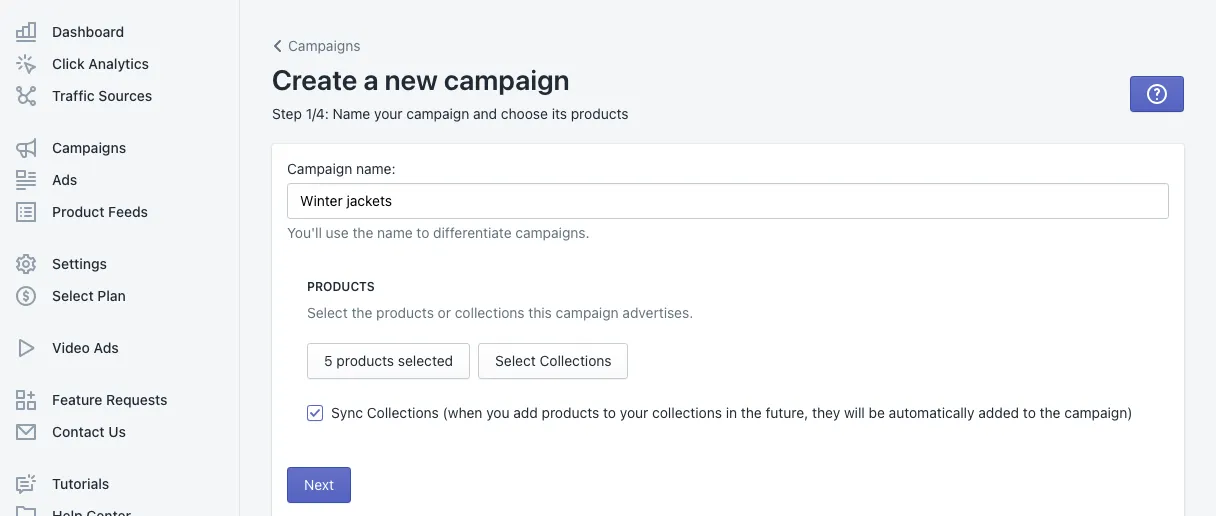
A campaign is a group of products you advertise together, with its own targeting and its own share of your budget. Click New Campaign on the Dashboard or in the Campaigns section and the wizard takes you through four steps.
Step 1: Name your campaign and choose its products
- Campaign name — anything that helps you tell your campaigns apart, such as Winter jackets.
- Products — click Select Products or Select Collections. Shopify’s product picker opens; search, tick what you want to advertise and click Add.
- Sync Collections — on by default. When you add products to a selected collection later, they join the campaign automatically.
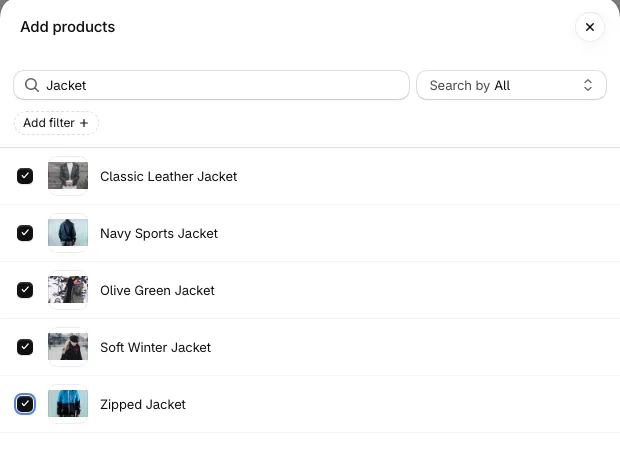
Tip: group products that sell to the same shoppers — jackets with jackets, not jackets with kitchenware. A focused campaign learns faster and is easier to target.
Step 2: Set up the targeting
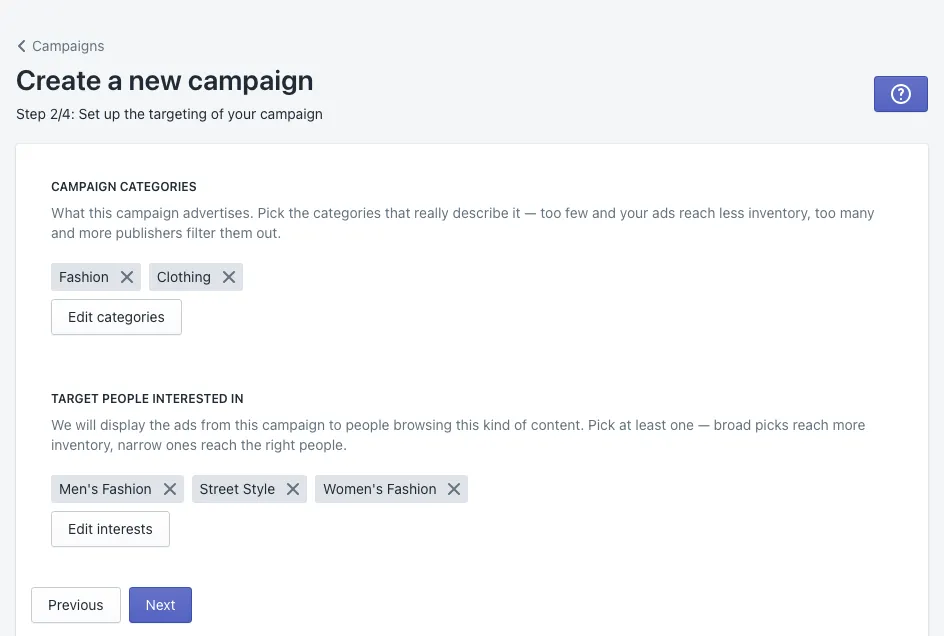
Now that you know what you advertise, choose who should see it.
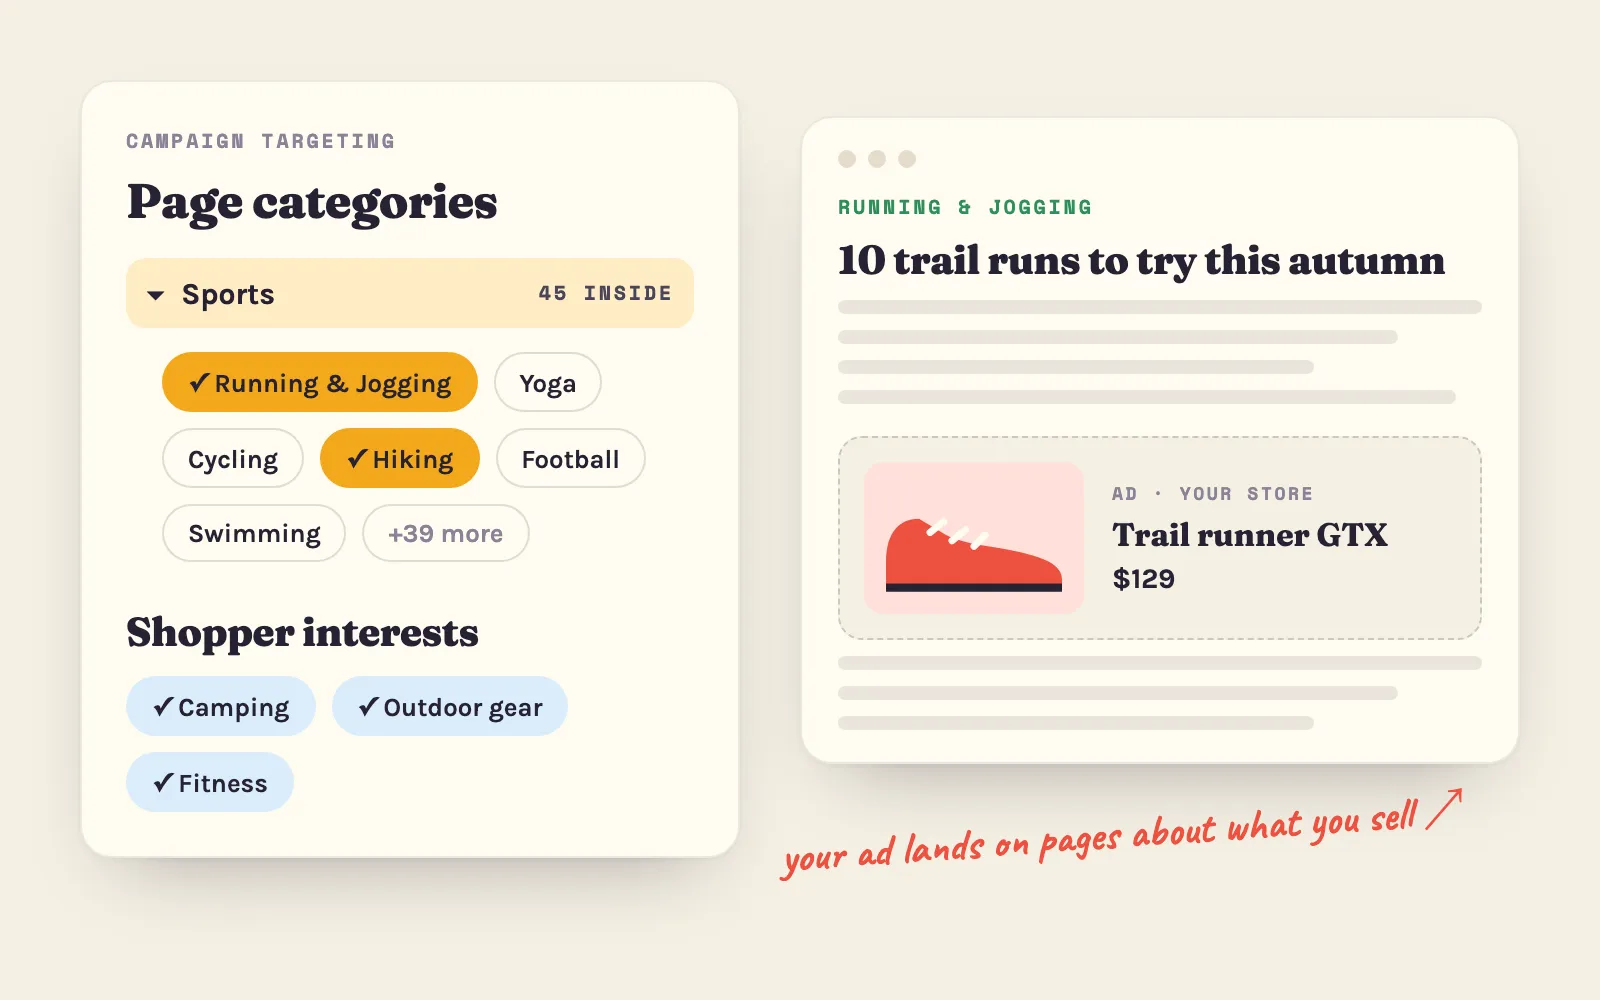
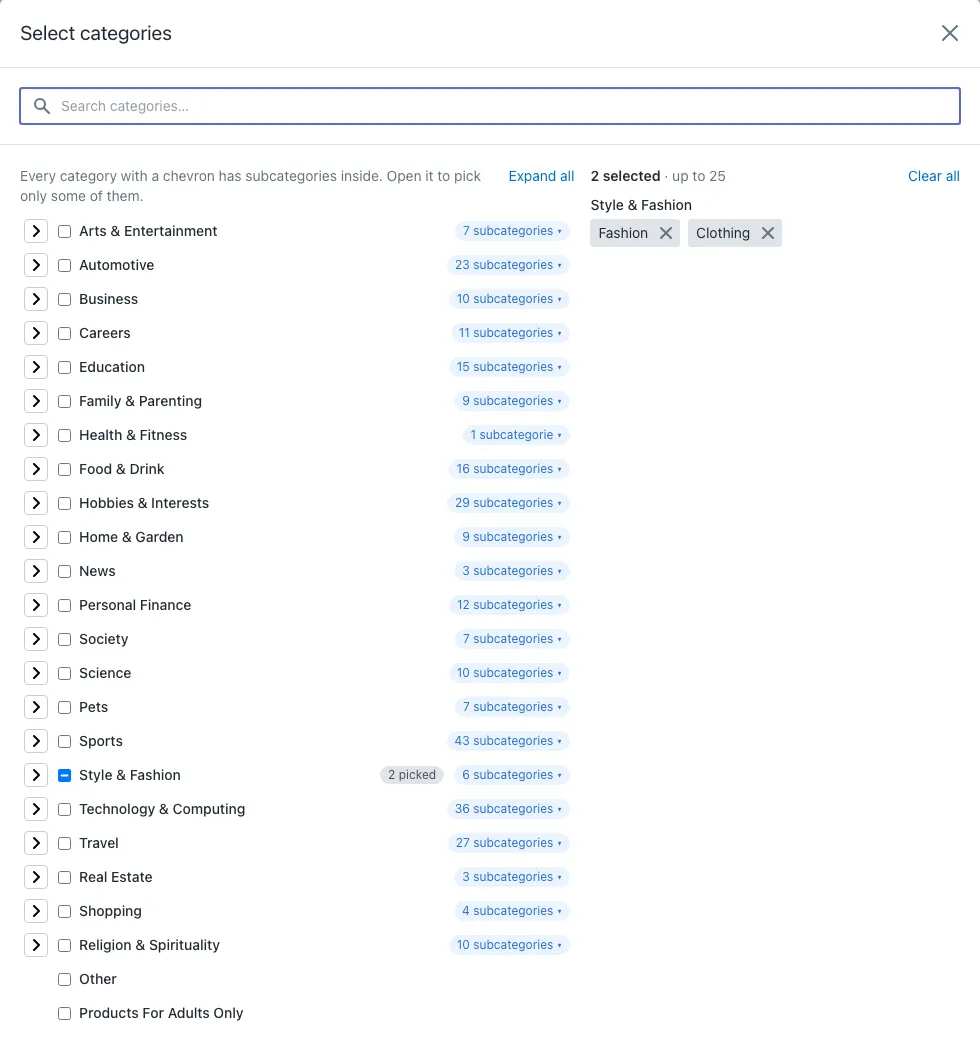
- Campaign categories — what the pages your ads appear on are about. There are 300+ categories; every category with a chevron has subcategories inside. Search by name, or open a category and pick only the parts that fit.
- Target people interested in — the shoppers’ interests, from 600+ options. Interests follow people across sites: a shopper interested in Street Style can see your jackets even while reading the news.
Pick at least one of each. Broad picks reach more places; narrow picks reach the right people. A good start: every category that really describes your products, plus three to five interests your best customers share. More in 300+ page categories and 600+ shopper interests.
Step 3: Set the budget for this campaign
On the paid plans your plan price is your monthly ad budget, and this step decides how much of it the new campaign gets.
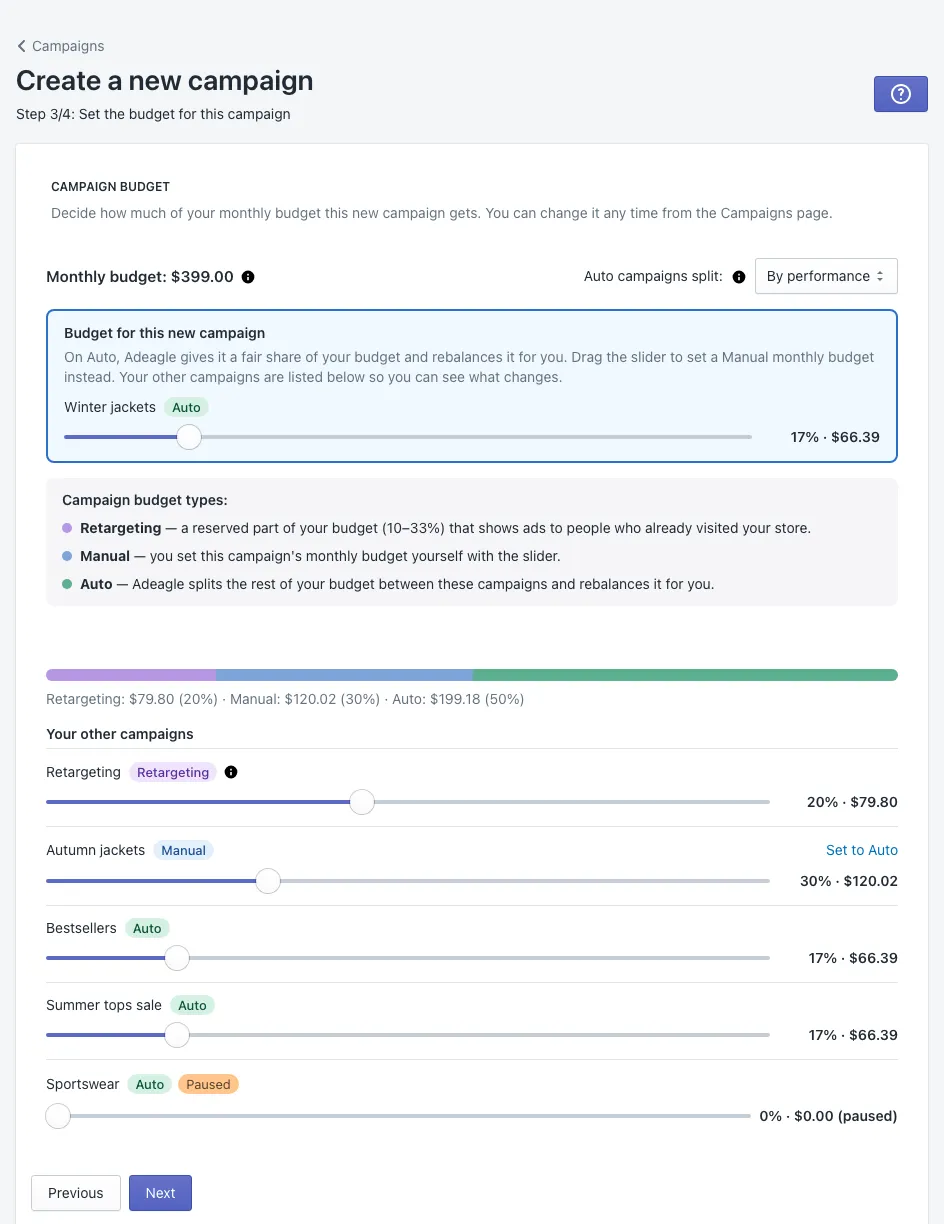
- Auto (the default) — Adeagle gives the campaign a fair share and rebalances it with your other Auto campaigns, either evenly or by performance.
- Manual — drag the slider to give the campaign a fixed monthly amount.
Your other campaigns are listed underneath, so you see what your choice changes before you save. You can change every budget later in Edit Budgets — see how per-campaign budgets work.
On the free Standard plan, this step asks how partner ads appear in your store instead: Topbar, Native, Banner or Notification Ads. One format is enough; you can change it later in Settings.
Step 4: Choose where to advertise
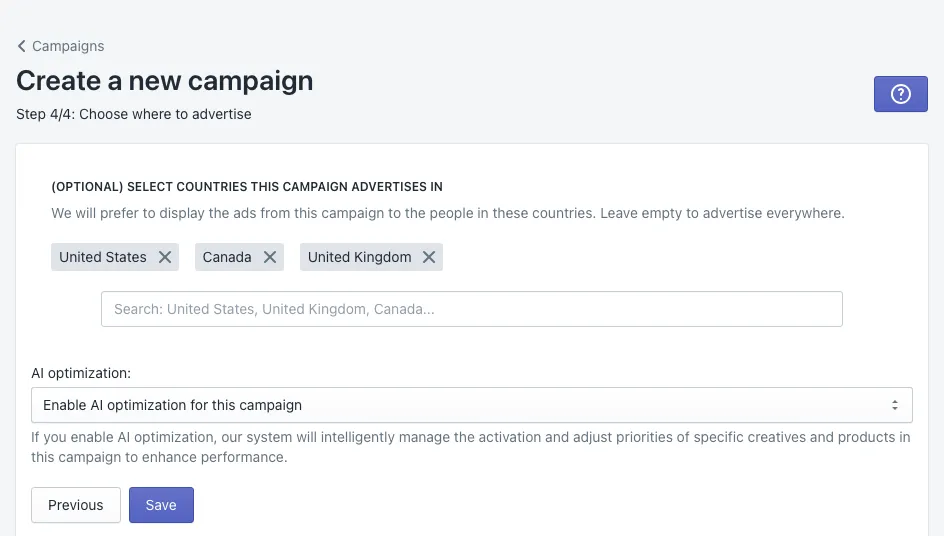
- Countries (optional) — Adeagle prefers to show this campaign’s ads to shoppers in these countries. Leave it empty to advertise everywhere, or pick only the countries you ship to — a click from a country you cannot deliver to never becomes an order. The countries of your first campaign become your default for new campaigns; you can change the default in Settings.
- AI optimization — on the paid plans, Enable AI optimization for this campaign lets Adeagle manage which banners and products run and how often, to raise your results. Choose I prefer to optimize the campaign manually to keep that control yourself. With AI optimization on, Adeagle reviews the priorities about once a week, so priorities you set by hand may change; you can switch it on or off later with the pencil in Campaigns.
If Adeagle is not yet enabled in your theme, this step shows a button to enable it — it is needed for tracking and retargeting.
Click Save. Your campaign appears in Campaigns and starts showing ads the same day.
After you launch
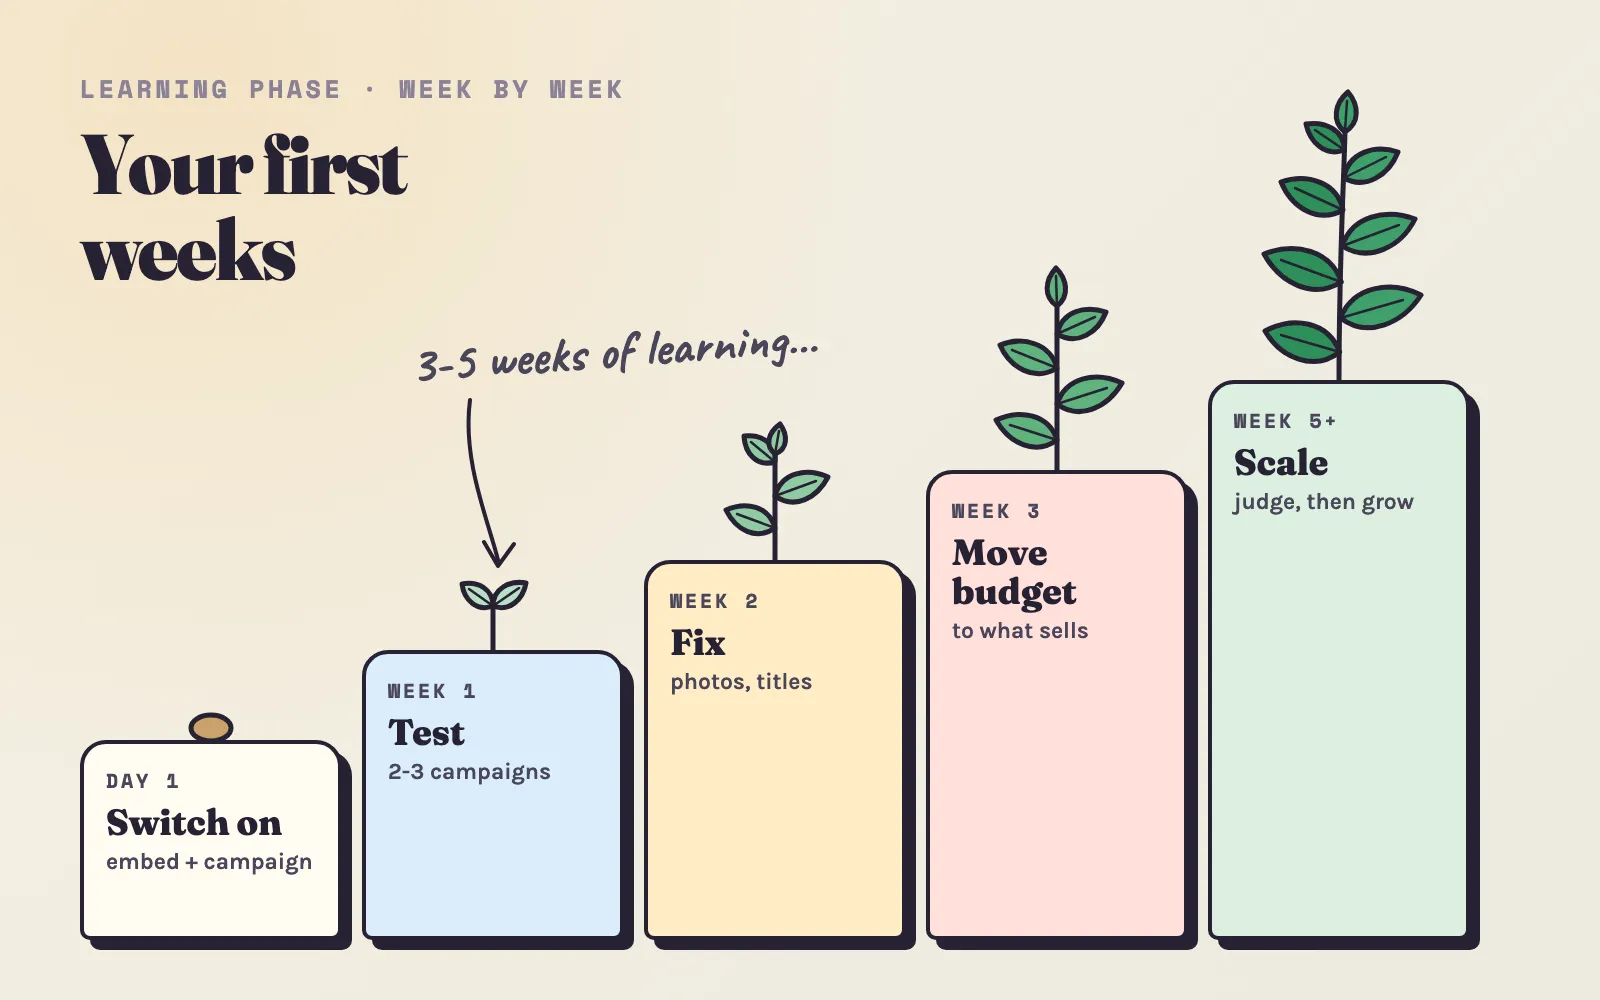
- The first three to five weeks are the learning phase. Adeagle tests placements and audiences, and your retargeting audience fills up; a progress bar on the Dashboard and in Campaigns shows how far it is. Do not judge the results yet.
- Create a second and a third campaign in week 1. The same collection with other categories and interests, or other collections with the same targeting — comparing campaigns is the fastest way to learn what works for your store.
- Improve weak products in week 2. In Product Feeds you can change a product’s image, title or price for your ads only. Check in Traffic Sources that the websites and apps fit what you sell.
- Move budget to what sells from week 3. Compare clicks, orders and ROAS in Campaigns and give the best campaigns more. The ROAS calculator shows the ROAS your margin needs to break even.
- Judge from week 5, on four weeks of numbers.
Your first weeks with Adeagle walks through each week in detail — what to change, what to leave alone, and how much traffic your sales need.
Questions
A few minutes. Your ads start running the day you save the campaign; the first weeks are a learning phase.
Either works. Collections with Sync on keep the campaign up to date - products you add to the collection later join the campaign automatically.
Yes. In Campaigns you can edit its name, categories, interests, countries and state, change its budget, and add or remove products in Product Feeds.